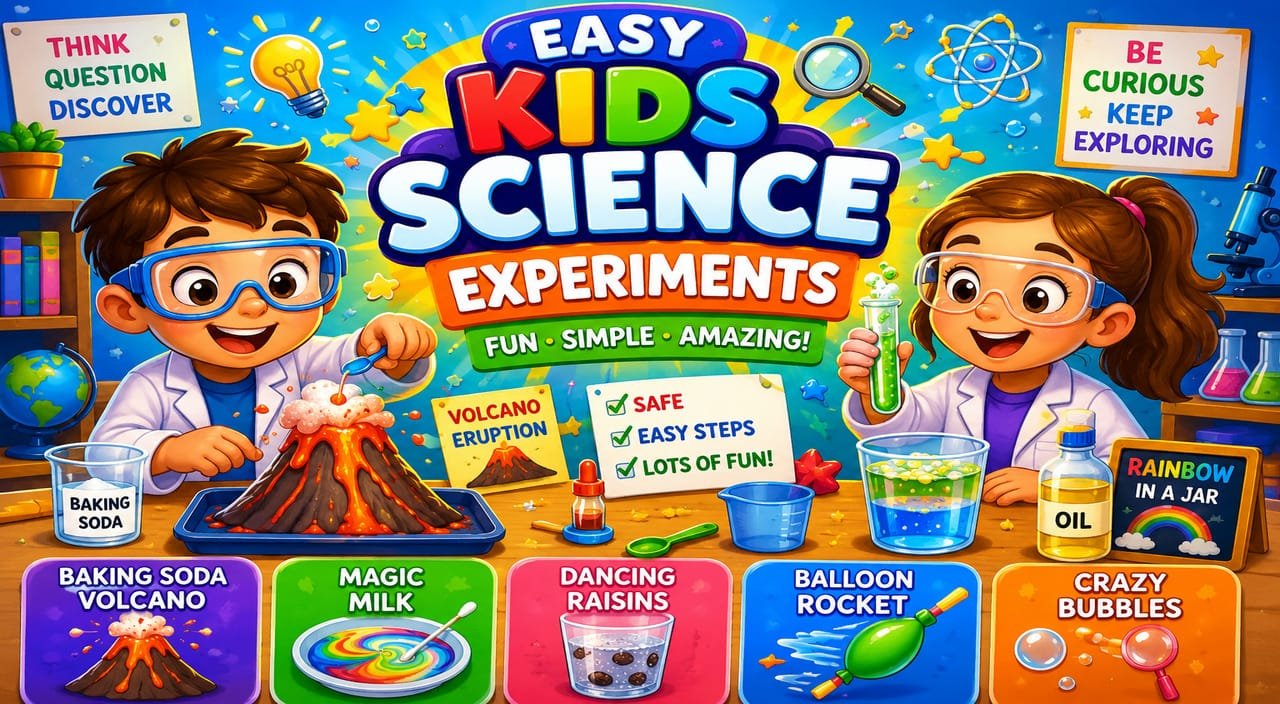
Easy kids’ science experiments are uncomplicated, secure ways to introduce core science concepts through interactive play. They utilize simple ingredients such as baking soda, vinegar, water, and food coloring to demonstrate obvious results.
They’re usually oriented toward straightforward measurements, observable reactions, and easily repeatable procedures that neatly fill small blocks of time. Parents and teachers can easily scale difficulty by changing quantities or adding timers.
The following sections provide materials, steps, and clear safety notes for each activity.
Key Takeaways
- Instill a scientist’s mindset by prompting kids to question, hypothesize, observe, and frame failed experiments as valuable learning experiences. This helps develop grit and a critical eye.
- Put safety first with adult supervision, non-toxic household items, protective gear, and clean working spaces for each experiment.
- Match activities to developmental levels and tweak difficulty so younger kids receive simple, confidence-building tasks and older children take on more complex, design-focused assignments.
- Utilize household items and kitchen counter science to keep experiments approachable, affordable, and applicable. This demonstrates how chemistry, physics, and biology appear in everyday life.
- It’s more important to learn the ‘why’ behind each activity. Talk about variables, controls, and real-world connections. Have kids make predictions and reflect on results.
- Record explorations with journals, photos, or printables and extend with next steps like inventing your own projects, sharing discoveries, and exploring connected STEM topics to keep the curiosity going!
The Scientist’s Mindset
The scientist’s mindset is a tight cluster of habits and attitudes that direct kids to conduct experiments, analyze outcomes, and endure failures. It mixes inquisitiveness, skepticism, meticulousness with data, and openness to collaboration.
These are the things to develop when instructing kids to learn simple science experiments:
- Ask clear questions and make testable predictions before starting.
- Watch and note with simple charts or notes.
- Have a scientist’s mind. Anticipate doubt and update beliefs as necessary.
- Treat failed trials as useful data, not final judgments.
- Use basic safety rules: supervision, goggles, gloves, and a tidy work area.
- Select age- and skill-level-appropriate activities for real wins.
- Foster cooperation and openness and stand on the shoulders of giants.
- Utilize common materials to demonstrate that science is approachable and imaginative.
Safety First
Any experiment involving vinegar, baking soda, heat, or sharp objects requires adult supervision. Adults should look over procedures and perform any risky tasks.
Give them simple safety equipment, such as goggles to shield their eyes from splashes and gloves for powders or heat. Demonstrate how to wear and remove equipment appropriately.
Maintain a clean working environment, keep trays underneath to catch spills, and always discard waste safely after each session. Opt for non-toxic household items when you can and read labels.
If you’re uncertain, swap a material for a safer one. Educate kids to stop and seek assistance if something is amiss.
Age-appropriate
Match experiment complexity to developmental stage so learning remains productive. For preschoolers, focus on sensory work and simple cause-effect: mixing colors, watching baking soda fizz in vinegar, or exploring sink-and-float with small objects.
Elementary students can do step-by-step procedures, measure in metric units such as milliliters and grams, and start easy data charts. Middle schoolers can tackle multi-step builds such as a mini solar oven, compute energy concepts, or validate theories with multiple trials.
Adapt instructions: use pictures and short steps for younger kids and add variables, controls, and metric measurements for older learners. It’s the success that builds confidence and keeps interest going.
Curiosity Culture
Design an environment that honors inquiry and where no concept is rejected. Demonstrate how to make inquiry into experimentation.
Provide a variety of chemistry, physics, biology, and easy engineering projects for students to discover their passion. Think of acid-base color changes, balloon rockets, seed germination, and straw bridge-building.
Take everyday objects such as spoons, jars, and cardboard and demonstrate that science is all around us. Have kids modify experiments, invent their own experiments, and exchange results with classmates.
This instills teamwork and demonstrates that scientific advancement is communal and innovative.
Kitchen Counter Science
Kitchen counter science transforms everyday household materials into transparent, hands-on experiments in physics, chemistry, and material science. With inexpensive materials and easy setups, it’s an approach to teaching absorption, chemical reactions, density, and emulsions that allows learners of any age to pose questions, draw observations, and adjust hypotheses.
1. Fizzing Fun
Mix baking soda and vinegar in a clear plastic bottle to create a bubbly eruption and observe gas being created during the reaction of sodium bicarbonate with acetic acid. Measure the foam height to compare quantities and introduce stoichiometry in simple terms.
Drop Mentos into soda to watch a carbonated geyser. Talk about nucleation sites and surface roughness as the mechanism, and encourage students to experiment with various candies or temperatures.
Squeeze fresh lemonade and measure acidity with pH strips or red cabbage as a natural indicator to connect flavor with quantifiable chemistry. Challenge kids to create their own fizzing experiments using vinegars, citrus juices, or yogurt and note bubble speeds. This develops experimental design and data logging skills.
2. Color Creations
Combine food coloring with milk and a few drops of dish soap to perform the magic milk experiment. Soap reduces surface tension and mobilizes fat molecules, generating swirl patterns that you can photograph and study.
Line up Skittles around the circumference of a plate and pour water over them to observe the colors diffuse outwards like rays of sunshine. Experiment with sugar content and temperature to watch the rate of diffusion change.
Make salt paintings by sprinkling salt upon wet watercolor to see how the salt absorbs the pigment and produces crystalline patterns. This is a basic lesson in absorption and evaporation.
Experiment with colored ice cubes in clear water to investigate melting rates and color mixing. Change cube size to introduce heat transfer and latent heat concepts.
3. Water Wonders
We established walking water with paper towels between cups of colored water to show capillary action and solvent transport and measured the height to which it rose as a function of time.
Kitchen counter science builds a liquid rainbow by layering oil, water, and syrup in a jar and measuring densities by mass per volume. Experiment with the water cycle by covering warm water with plastic wrap and observing condensation, then collecting the droplets to demonstrate phase change.
Explore surface tension by floating a paperclip or adding soap to break the film and connect molecular forces to observable phenomena.
4. Physics Play
Construct cardboard ramps to experiment with how mass, slope, and surface texture impact rolling speed. Record times and graph the results to explore concepts of friction and gravity.
Build a balloon rocket on a string to demonstrate Newton’s third law at work and contrast thrust with different balloon dimensions. Create a leakproof bag by puncturing a sealed bag of water with pencils to watch polymers at work.
Take some rubber bands and sticks and make a catapult. Investigate projectile motion using distance and angle as your variables.
5. Edible Experiments
Let’s grow sugar crystals on string and learn about crystallization or try varying temperature and saturation to compare growth rates.
Layer juices and colored water to experiment with density and buoyancy. Stir cornstarch and water into edible slime and investigate non-Newtonian flow.
Slice apples and use lemon juice to slow browning, showing oxidation control.
Adapting Your Lab
Adapting your lab is transforming whatever rooms you’re working in and whatever household items are available into a repeatable, safe, teachable science space. A brief description of objectives, materials, and setup keeps experiments streamlined and allows students to concentrate on the research, not the preparation.
Indoor Ideas
- Construct simple structures using LEGO bricks, Popsicle sticks, or cardboard to experiment with load, balance, and center of mass.
- Stir water and cornstarch to prepare oobleck and experience shear-thickening when you punch or pour it.
- Make sidewalk chalk paint using cornstarch, water, and food coloring and explore mixtures and drying rates on different surfaces.
- Establish a mini makerspace bin with straws, tape, rubber bands, and cups for on-the-fly prototyping of bridges or shelters.
- Create a DIY compass with a needle, a straw, a magnet, and a bowl of water for mapping local magnetic north.
- Use jars, food coloring, and measuring spoons for your density columns and diffusion experiments.
- Take on the egg drop challenge with your home padding: newspaper, socks, and bubble wrap, and investigate impact force and energy absorption.
- Conduct a hands-on experiment with a coffee cup and rubber bands for a stretch and pluck test of vibration and pitch.
Indoor setups function on a kitchen counter, dining table, or in a small nook. Store jars, cups, food coloring, and measuring spoons in transparent bins for immediate grab and go. Free printable hypothesis, steps, and observations recording sheets fit different learning styles.
For building, a tray or shallow bin confines messes and keeps tiny pieces from tumbling across the floor.
Outdoor Options
Shoot bottle rockets made from plastic bottles, vinegar, and baking soda in an open space to investigate thrust and reaction forces.
Make giant soap bubbles with a wand constructed from sticks and string. Experiment with how solution proportions impact the size and longevity of the bubbles.
Do the blubber experiment by sticking a gloved hand in icy water, comparing the insulation provided by fat to learn about thermal conduction.
Gather rocks, leaves, and soil samples to categorize texture, pH, and organic levels. Employ easy kits or litmus strips for on-site tests.
Outdoor labs permit larger-scale, messier experiments, so select a level open area and demarcate a safety zone. Tinker in your lab.
Adapt your lab with recycled bottles, string, and sticks as cheap tools, and spur your builders to turn a functional umbrella out of household materials to test waterproofing and load-bearing.
Offer examples: a straw-frame shelter, a Popsicle-stick beam, or a cardboard bridge. By rotating supplies every season and storing them in labeled jars or bins, you keep the space flexible and eco-friendly.
Beyond The “Wow”
Drill down past the ‘wow’ to what each experiment teaches you about nature and methods. A fast volcano or color transformation is the lure, not the destination.
Design experiments so they demonstrate cause and effect, observe safety and messy potential, and present each activity as an investigation linking to actual systems and engineering. Employ easy-to-fill reflection sheets to record hypotheses, actions, observations, and next tries.
The Why
Describe the science in transparent, tangible words. For vinegar and baking soda, mention that an acid-base reaction emits carbon dioxide gas that balloons or pushes liquid out, which is a chemical change kids can quantify by volume or pressure.
Use variables and controls: run two tests with different amounts of baking soda to show how quantity affects the rate of gas release. Density, states of matter, and energy change show up in many small demos.
Oil-and-water layers teach density, ice melting shows latent heat, and Mentos with soda illustrates rapid nucleation tied to surface tension and dissolved gas. Have kids make predictions, record them on a worksheet, and compare later to the results.
That feedback loop develops their critical thinking and scientific habit.
Real World
Bridge each to day-to-day tech and industry. A prism dispersing white light connects to lens-based cameras and fiber networks. Diapers utilize superabsorbent polymers, which you can replicate using safe gel experiments to talk about absorption and material design.
Kitchen science, such as making rock candy, is crystallization on a domestic scale and mirrors candy and mineral formation. These weather demos, evaporation, condensation in a jar, and cloud in a bottle, connect to the water cycle and meteorology.
Engineering activities, building load-bearing structures with LEGOs or popsicle sticks, mimic real bridge design and expose them to simple machines and force distribution. Walking Rainbow activities demonstrate capillary action and balance in plants.
Reference seasonal projects, like decomposing pumpkins, to learn about ecology and microbes.
Next Steps
- Design a controlled follow-up: pick one variable to change, document methods, and measure results. Have a safety plan for messy demos.
- Turn a favorite demo into a project for a fair: Form a question, run trials, use charts to show patterns, and prepare a short oral summary.
- Keep a science journal: date entries, sketch setups, log measurements in metric units, and note surprises and hypotheses for later tests.
- Dive into connected STEM topics online or at virtual kids’ science labs to discover in-depth explanations, videos, and printable reflection sheets that direct additional experimentation.
Documenting Discovery
Documenting discovery provides a crisp frame for how a small experiment turns into something you learn from and have a record of to return to. Begin with a summary sheet that records the experiment title, date, materials with metric measures, a basic hypothesis, and action-by-action steps. Our printable experiment recording sheet guides kids to record what they used and what they thought would happen.
This makes it easier to identify patterns later and to repeat the test with controlled changes. Provide examples on the sheet. For a baking soda volcano, list “100 g baking soda, 50 ml vinegar, food dye,” then have a line to state, “Hypothesis: larger vinegar volume makes bigger fizz.”
Teach kids to append pictures to their notes. Photos and videos document timing, color, and motion that words can’t capture. Urge them to photograph the setup before, video the key reaction, and close-up post the result. If no camera is available, a drawn diagram of the setup with labels works just as well.
Drawing compels you to pay close attention to placement and scale, which is often where you discover why your result deviated from the hypothesis. Give concrete prompts: “Take a photo at 0 seconds, 10 seconds, and 60 seconds” or “Draw the setup with measurements in cm.
Have them share their findings with family, friends, or classmates to develop their skills in science communication. Create a simple template for a 2- to 3-minute presentation: state the question, show the hypothesis and materials, describe the steps, display a photo or drawing, and summarize the result and one lesson learned.
Sharing uncovers holes in your logic and opens you up to feedback. That is how science works. Offer examples of audiences: a sibling, a classroom, or a short video to post to a private group where peers can comment.
Employ reflection prompts that assist children in summarizing their learning and strategizing future actions. Prompts can include “What worked as expected?” “What surprised you?” “Which variable could you change next?” and “What safety step would you add?”
As noted in the article, reflection encourages critical thinking and helps kids learn from errors, a core tenet of the scientific method. Encourage a systematic habit: date every entry, keep a lab notebook or folder for sheets and images, and note any deviations from steps.
This approach, over time, creates an organized journal of advancement and assists in identifying trends across research.
Our Philosophy
We think every kid is a scientist through hands-on discovery and simple science experiments. Kids learn by doing. Easy exercises that utilize visual, tactile, olfactory, and gustatory senses allow children to develop hypotheses, experiment with them, and change what they believe.
To use, just follow simple steps, a handful of thought-provoking questions, and fast methods to verify results. For instance, combining baking soda and vinegar to create foam demonstrates cause and effect. Adding food coloring turns it into a lesson in mixtures and observation. These small victories instill confidence and demonstrate to young students that inquiry is doable and scalable.
We cherish ingenuity, inquisitiveness, and tenacity as the hallmarks of scientific exploration and education. Innovation assists kids in discovering fresh connections between items, whether that’s utilizing fruit juices to display acid-base transformations or illustrating circuits with conductive ink.
Curiosity compels the questions they pose, and persistence enables them to repeat an experiment or vary one item at a time. Promote record keeping with easy charts or pictures. Provide prompts like “What if we change this?” to push thinking further. These habits constitute the muscle of critical thinking and problem-solving.
We pledge safe, affordable, and accessible materials so all families can get in on the science fun. Most projects can make do with kitchen staples—flour, sugar, salt, vinegar, lemon, food coloring—or inexpensive craft supplies.
Safety notes must be explicit: use non-toxic materials, supervise heat or sharp tools, and adapt experiments for different age ranges. Include metric measurements and transparent illustrations to keep setup both easy and consistent across geographies. Recommend replacements when something particular is missing, for example, trade out citric acid powder for lemon juice.
We hope to ignite lifelong passion for STEM by engaging in science that is interesting, meaningful, and accessible to kids of all ages. Mix food, STEM, and arts into edutainment that plays like play but teaches real concepts.
A food science experiment can demonstrate chemical change and cultural context. An art layer allows kids to document results and discover patterns. This integrative strategy connects topics so children understand how science is relevant to everyday life.
It works well for ages 4 to 12 with adjustments: sensory play and guided questions for younger kids and more controlled variables and data logging for older ones. The aim is hands-on, immersive education that transcends memorized facts and assists kids in developing real skills they will apply at school and in the workplace.
Conclusion
These easy experiments ignite huge curiosity. Hands-on experiments on the kitchen counter bring concepts to life. Simple stages, focused objectives, and protective equipment keep children engaged and enthusiastic. Little victories create ability. Stir up a baking-soda volcano with a speedy note-taking habit. Pair a seed germination chart with a color-mixing paint test. Let a phone camera capture change over time. Share results with friends or your class blog to enhance pride and talking abilities.
Keep projects brief and replicable. Let kids ask why and experiment with new twists. Focus on one skill at a time, such as measuring or predicting. Aim for practice, not home runs. If you crave more experiment lists or templates, check the blog for ready-to-roll plans and printable logs.
Frequently Asked Questions
What are simple, safe science experiments I can do at home with kids?
Employ common kitchen cupboard staples such as baking soda, vinegar, food coloring, dish soap, and balloons. How about a volcano, rainbow jar, or static electricity with a balloon? Be sure to always monitor and describe safety precautions before beginning.
How do I choose experiments by age and skill level?
Choose sensory and cause-and-effect activities for ages three to five. Employ measurement and basic variables for ages six to nine. Add hypothesis testing and simple data recording for ages ten and up. Make sure you match instructions to attention span and fine motor skills.
How can I keep experiments educational and not just about the “wow”?
Ask questions before, during, and after the activity. Promote hypothesizing, observation, and explanation. Tie outcomes back to tangible ideas such as states of matter, energy, or biology to really make the information stick.
What safety precautions should I follow for kitchen-counter experiments?
Use goggles where splashes might occur. Use non-toxic ingredients and small quantities. Have a first-aid kit and a spill plan handy. Watch carefully and go over rules with kids prior to play.
How should we document discoveries and track learning?
Just a basic notebook, pictures, or audio would work. Jot down hypotheses, steps, observations, and results. Going over entries with your kids lets them see progress and develops scientific thinking.
How can I adapt experiments for limited space or resources?
Scale down amounts, use trays to contain mess, and select activities involving common materials. Most experiments fit in a tiny kitchen or balcony and still impart key scientific concepts.
Why is fostering a scientist’s mindset important for kids?
It develops curiosity, critical thinking, and problem-solving skills. These skills bleed through to school and everyday life. Compact experiments keep science accessible and build confidence gradually.